
Ever wonder how a drop of pond water can be a whole micro world? A microscope reveals this hidden world by magnifying small objects and bringing out details the unaided eye cannot see. Microscopy continues to be an essential tool in biology, medicine, and laboratory work, with applications including the study of cells and microorganisms and the study of tissue architecture (Cole, 2016).
The compound light microscope is one of the most commonly used microscopes in educational and research laboratories. It magnifies a specimen of interest using visible light and several lenses. But magnification isn’t enough to give a clear image. Focusing the microscope, illuminating the specimen, and preparing the specimen are as critical as lens care for meaningful observations (Sanderson, 2020).
Learning microscopy is not simply learning which knobs to turn; it is about learning. Learning microscopy, then, is not just learning which knobs to turn; it is learning. It includes understanding how the instrument works, proper specimen handling, and knowing when an image needs adjustment rather than increased magnification.
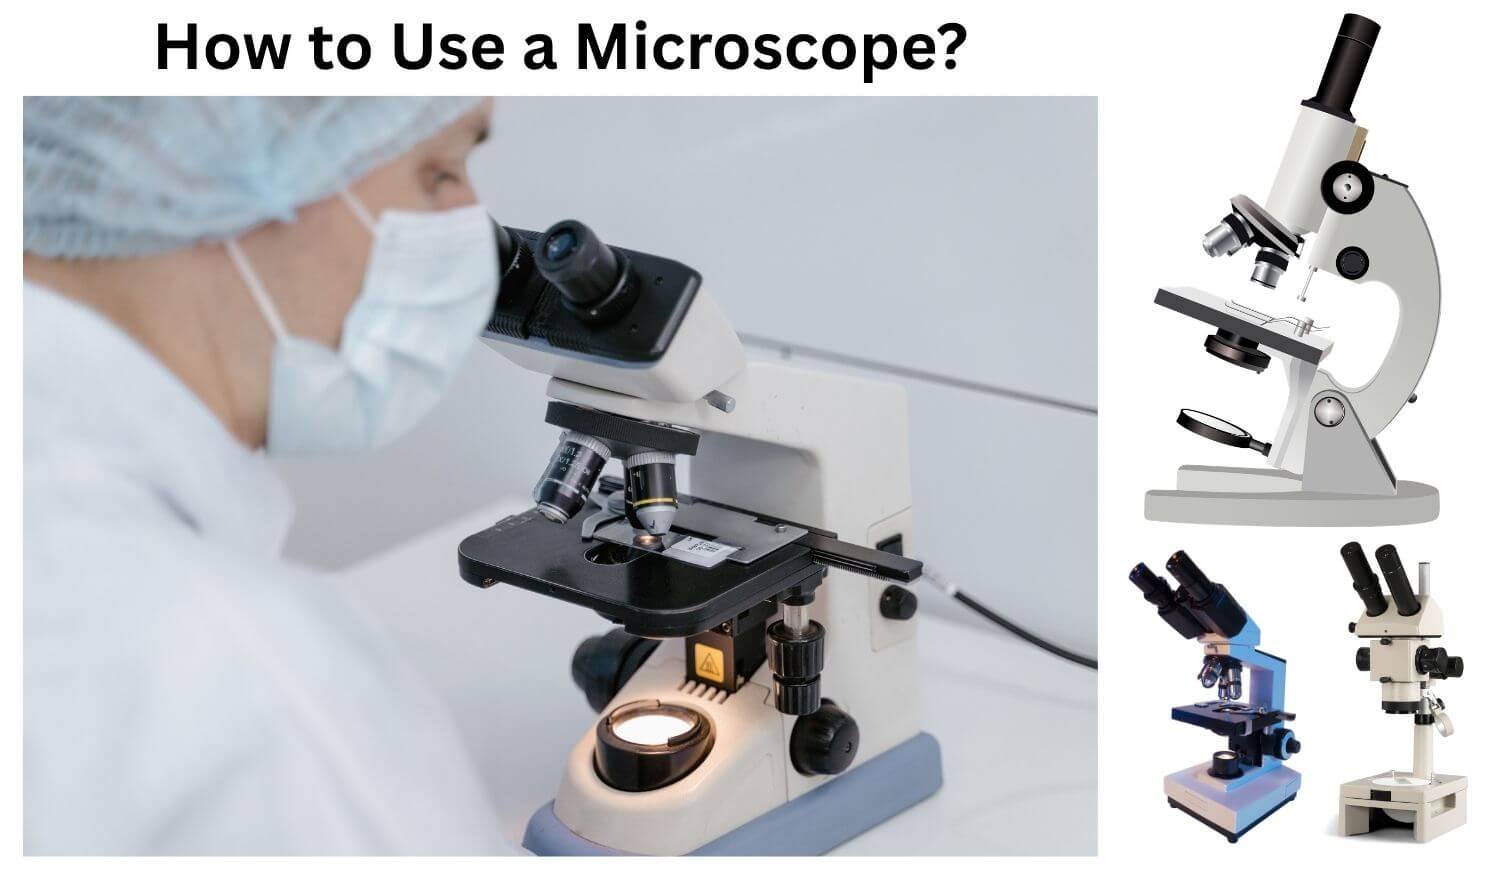
Parts and Functions of a Microscope
A compound light microscope consists of optical, mechanical, and illumination components that work together to produce an image (Sanderson, 2025).

| Part | Function |
| Eyepiece (ocular lens) | Magnifies the image produced by the objective, commonly by 10×. |
| Objective lenses | Provide primary magnification and determine much of the image resolution. |
| Revolving nosepiece | Holds the objectives and allows magnification changes. |
| Stage | Supports the microscope slide. |
| Mechanical stage controls | Move the slide horizontally and vertically. |
| Coarse adjustment knob | Moves the stage or body tube rapidly for initial focusing. |
| Fine adjustment knob | Makes small adjustments to sharpen the image. |
| Condenser | Concentrates and directs light through the specimen. |
| Iris diaphragm | Controls the light cone and influences contrast and resolution. |
| Illuminator | Provides light for viewing the specimen. |
| Arm and base | Support the instrument and provide stability. |
A special stage that should be placed on special attention is the objective lenses as each one has a different magnification and working distance. The condenser and diaphragm also play a role: If the specimen is set up correctly, but the illumination is not, it can also lead to glare, weak contrast or loss of fine detail (Wayne, 2014).
How to Set Up a Microscope?
Before placing a specimen under the microscope, prepare the instrument carefully.
- Carry it safely: Use two hands, supporting the arm with one and the base with the other.
- Position it correctly: Place it on a stable, clean bench away from the edge.
- Inspect the instrument: Check that the lenses are clean, the stage is unobstructed, and the power cable is undamaged.
- Select the lowest-power objective: Rotate the nosepiece until the 4× or 10× objective clicks into position.
- Switch on the illumination: Begin with moderate brightness rather than maximum intensity.
- Adjust the condenser and diaphragm: Set the condenser appropriately for the objective and adjust the aperture diaphragm to balance contrast and resolution.
If there is a need for optical performance and uniformity of the field, Köhler illumination can assist. Need to make further adjustments to the field diaphragm, condenser and illumination systems: follow manufacturer’s manuals or laboratory procedure (Salmon et al., 2005).
How to Prepare and Place a Microscope Slide?
Poor preparation can introduce air bubbles, distort cells, or make structures difficult to distinguish.
For a simple wet mount, follow these steps:
- Place a clean microscope slide on a flat surface.
- Add a small drop of water or an appropriate mounting liquid.
- Transfer a thin specimen, such as an onion epidermis, into the drop.
- Hold a coverslip at approximately 45 degrees and lower it gently over the specimen to reduce trapped air.
- Blot excess liquid from the slide edges using absorbent paper.
- Place the slide on the stage, secure it with the stage clips, or use the mechanical stage holder.
A thin, even spread will allow light to pass greater. When staining is necessary use the correct stain and preparation procedure. Stains can enhance contrast by emphasizing specific parts of the cell, while fixation can help maintain the integrity of the cell structure and prevent degradation (Isaac et al., 2023).
While wet mounts can be used to view fresh specimens, prepared histological slides may need to be fixed, dehydrated, sectioned, and permanently mounted. The method of preparation should reflect the specimen and its purpose of examination (Ruzin, 1999).
How to Focus a Microscope Step by Step?
Focusing is easiest when performed systematically, beginning with the lowest-power objective.
- Place and secure the slide: Position the specimen over the central opening in the stage.
- Center the specimen: Use the stage controls to bring the region of interest into the middle of the viewing area.
- Observe through the eyepiece: Keep both eyes relaxed where possible and adjust the interpupillary distance on binocular microscopes until the two fields merge.
- Use coarse focus at low power: While watching through the eyepiece, turn the coarse adjustment knob slowly until the specimen appears.
- Sharpen with fine focus: Make small adjustments until the image becomes clear.
- Improve illumination: Adjust brightness, the condenser, and the diaphragm to reveal useful detail.
- Move to higher magnification: Center the specimen before rotating to the next objective.
- Refocus carefully: Use the fine adjustment knob to sharpen the image.
Some microscopes are parfocal, that is the specimen will be approximately in focus when changing objectives. However, some corrections should be made that will be small. As the magnification increases the field of view becomes smaller and the working distance shorter, especially at higher magnifications and accurate centering is of critical importance (Sanderson, 2020).
Note: Never force an adjustment knob or allow an objective to strike the slide. If the specimen disappears after changing objectives, return to the lower magnification, relocate it, and center it again.
How to Adjust Magnification and Light Intensity?
Resolution is the extent to which two very close details can be resolved, while the appearance of the image depends on the magnification. A higher magnification does NOT necessarily produce a higher resolution image, and can be known as empty magnification (Wayne, 2014).
Use good lighting and gradually increase it as needed. Too much or too little light can create problems of visibility and glare. Aperture of the light cone is controlled by the iris diaphragm, which determines the contrast and resolution. This can help to enhance the contrast in some specimens, but too much adjustment can cause loss of fine detail.
The condenser must be set up correctly for the objective being used. If available, contrast may also be enhanced with appropriate staining or by special methods of contrast, such as phase-contrast microscopy, for transparent specimens.
It’s not so much about maximizing every setting. The challenge is to find a balance that reveals the structures that are important for the observation.
How to Calculate Total Magnification?
Total magnification is calculated by multiplying the magnification of the eyepiece by that of the objective lens.
Total magnification = Eyepiece magnification × Objective magnification
For a standard 10× eyepiece:
| Objective | Calculation | Total magnification |
| 10× | 10 × 10 | 100× |
| 40× | 10 × 40 | 400× |
| 100× | 10 × 100 | 1,000× |
For example, viewing a specimen through a 10× eyepiece and a 40× objective produces a total magnification of 400×.
Remember that total magnification describes image enlargement, not the amount of detail resolved. Optical resolution depends on factors including the objective’s numerical aperture, illumination wavelength, and optical quality (Sanderson, 2025).
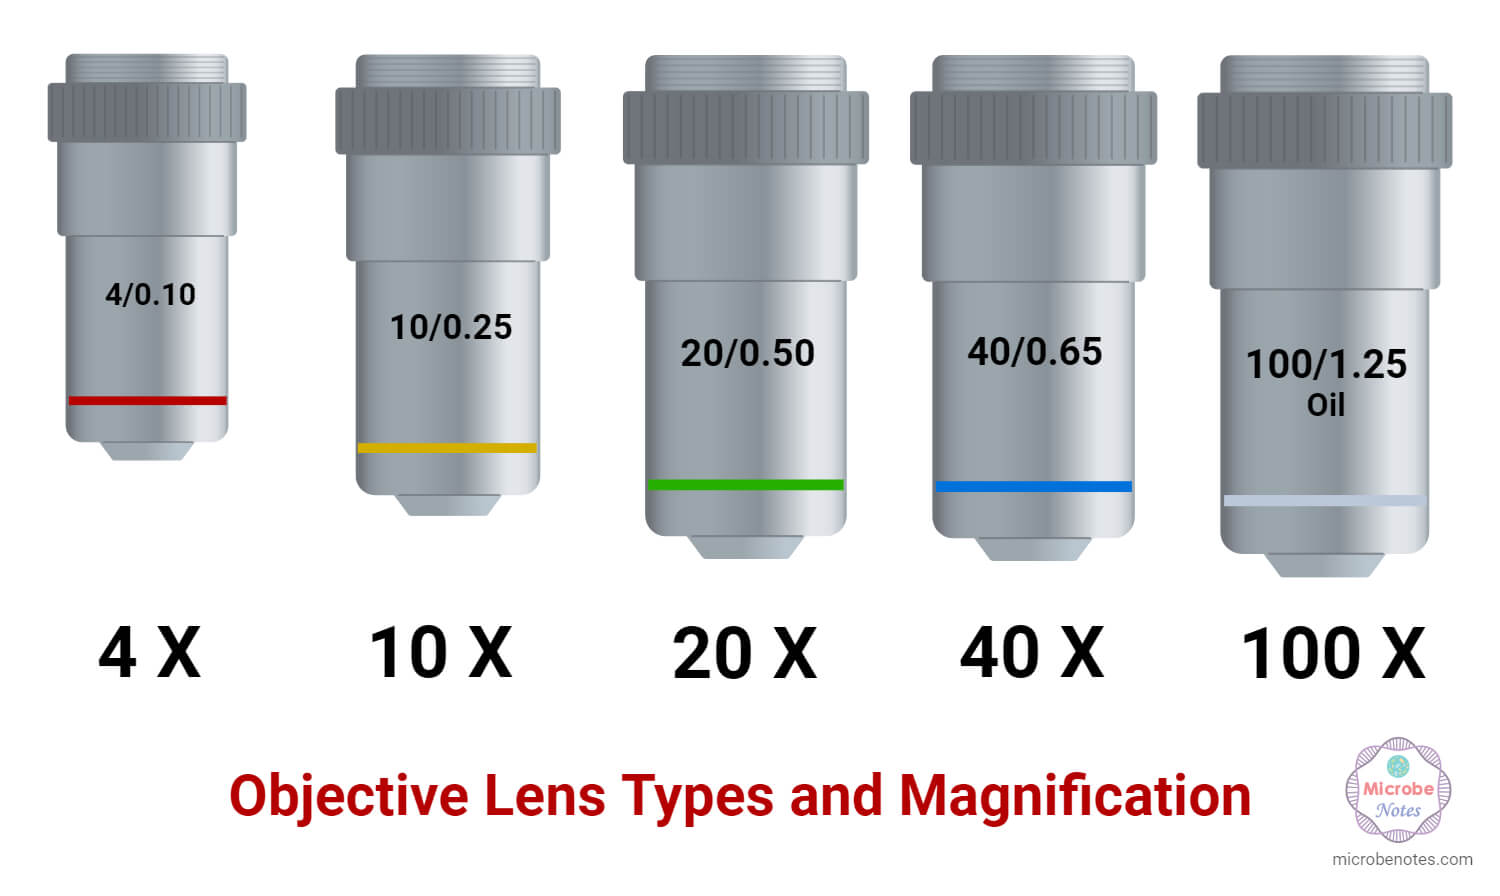
How to Use the 10×, 40×, and 100× Objectives?
Each objective serves a different purpose, and choosing the appropriate one makes observations easier and safer.
- 10× objective: Useful for locating specimens, surveying larger structures, and selecting a region of interest. It provides a relatively wide field of view and a greater working distance.
- 40× objective: Suitable for examining smaller structures, including cellular details. Center the specimen carefully before switching to this objective and use fine focus.
- 100× objective: Commonly designed for oil immersion. It is used to resolve fine details, particularly in stained bacterial preparations, when the objective and specimen are compatible with immersion oil.
The 100× objective is not simply a stronger version of the 40× objective. Its optical design is intended to work with immersion oil, which improves light collection and resolution. Always check the markings on the lens barrel before use (Leck, 2009; Sanderson, 2025).
How to Use Immersion Oil With a Microscope?
Immersion oil reduces the difference in refractive index between the glass slide and the objective’s front lens. This allows more light to enter the objective, improving its numerical aperture and resolving power.
To use it correctly:
- Locate and focus the specimen under the 40× objective.
- Center the area of interest.
- Rotate the nosepiece away from the 40× position.
- Place a small drop of the microscope manufacturer’s recommended immersion oil on the coverslip or slide surface, as appropriate for the objective.
- Rotate the designated 100× oil-immersion objective into the oil.
- Observe the specimen and make fine-focus adjustments.
- After use, clean the objective and slide according to the manufacturer’s instructions.
Never use immersion oil with a dry objective. Oil on a lens not designed for it can contaminate the optics and degrade image quality. Also, do not assume that every 100× objective requires oil; inspect its markings first. Promptly remove oil from the lens by using approved lens tissue and cleaning fluid (Sanderson, 2025).
How to Observe and Identify Specimens Under a Microscope?
To identify a shape on a micro-scale, it is necessary to identify it as a familiar shape. First do a low-power scan of the specimen, then study specific areas at high power.
Pay attention to:
- Shape and size: Determine whether structures are spherical, rod-shaped, elongated, or irregular.
- Arrangement: Observe whether cells occur singly, in pairs, chains, clusters, or organized tissues.
- Internal features: Look for nuclei, cell walls, chloroplasts, or other visible structures when the preparation permits.
- Staining patterns: Compare the colour and distribution of stained structures, remembering that staining can alter their appearance.
- Movement: Distinguish genuine biological movement from drifting caused by liquid currents or stage movement.
In an epidermal preparation, for instance, onion, the plant cells may be seen arranged in a regular pattern with prominent cell walls. Differences in cell shape and arrangement might be seen in a stained bacterial smear; the only limitation to this is that morphology is generally not a reliable basis for definitive bacterial identification.
To diagnose reliably, it must be compared with valid reference materials and sometimes a further staining or biochemical or molecular test is required. Make notes on the specimen, magnification, preparation and observations. Photomicrographs should include an appropriate scale bar when measurements or size comparisons are important (Gill, 2012; Isaac et al., 2023).
Common Microscope Mistakes and How to Avoid Them
| Common mistake | Why it causes problems | How to avoid it |
| Starting at high magnification | Makes the specimen difficult to locate. | Begin with the lowest-power objective. |
| Using coarse focus at high power | Risks striking the slide. | Use fine focus at higher magnifications. |
| Poor slide preparation | Produces bubbles, overlapping structures, or uneven illumination. | Prepare a thin, clean, suitable specimen. |
| Excessive illumination | Can reduce contrast or create glare. | Adjust brightness and the diaphragm gradually. |
| Failing to center the specimen | The region of interest may disappear at higher power. | Center it before changing objectives. |
| Using oil on a dry lens | Can contaminate or damage the optical system. | Apply oil only to compatible objectives. |
| Cleaning lenses with ordinary tissue | May scratch or leave fibres on optical surfaces. | Use approved lens paper. |
| Assuming every image is reliable | Poorly focused or aligned images can still look convincing. | Check focus, illumination, and specimen quality. |
(Kubow & Harsh, 2025).
How to Clean, Maintain, and Store a Microscope?
Regular maintenance protects the microscope’s optical quality and extends its service life.
- Switch off the illuminator and unplug the instrument before cleaning external surfaces.
- Remove immersion oil from compatible objectives immediately after use, following the manufacturer’s guidance.
- Clean lenses only with lens paper and approved optical cleaning solutions. Avoid touching optical surfaces with bare fingers.
- Remove slides and wipe the stage if necessary, taking care not to damage its finish.
- Return the lowest-power objective to position and lower the stage when appropriate.
- Wind the power cable loosely without bending or pulling it sharply.
- Cover the microscope with a dust cover after it has cooled and store it in a dry, secure location.
Avoid dismantling optical components or using solvents where they are not needed. Internal cleaning, alignment and mechanical repair work must be performed by an experienced person. If the focus is correct and the image still doesn’t come into focus, report it, do not try an unfamiliar repair (Friedman & Abramowitz, 1997; Sanderson, 2025).
Safety Precautions When Using a Microscope
- Carry the microscope with two hands and keep it upright.
- Handle slides and coverslips carefully because glass can break and cause cuts.
- Wear appropriate personal protective equipment when examining biological specimens or using stains, fixatives, and mounting chemicals.
- Treat unknown biological samples according to laboratory biosafety procedures.
- Never pipette biological materials by mouth or eat and drink at the microscope bench.
- Dispose of contaminated slides, broken glass, and chemical waste in designated containers.
- Keep electrical components away from liquids and report damaged cables immediately.
- Wash your hands after handling specimens and clean the work area according to laboratory procedures.
Chemical fixatives and stains can be dangerous, as well as the microscope. Use safety data sheets and institutional procedures, especially when working with potentially infectious specimens and hazardous reagents (Ruzin, 1999).
Conclusion
Effective microscope use requires careful preparation, proper optical design, patience when focusing, and proper care of the instrument. At low magnification, center and focus the specimen, set up the light, and choose the appropriate objective; the rest is automatic. Knowing the total magnification and the role of immersion oil will minimize common errors in optical microscopy and maximize the value of the findings through proper recording and careful interpretation.
Learning microscopy takes practice, but it is more about asking useful questions about the sample you’re observing. With a good slide and a properly configured microscope, you can see details that would otherwise be hidden, and the microscope is an old faithful in discovering the living world.
References
- Cole, E. S. (2016). Conventional light microscopy. In Current protocols essential laboratory techniques. Wiley. https://doi.org/10.1002/0470089941.et0901s12
- Friedman, M. M., & Abramowitz, J. R. (1997). Microscope alignment. Current Protocols in Cytometry. https://doi.org/10.1002/0471142956.cy0207s02
- Gill, G. W. (2012). Cytopreparation: Principles and practice. Springer.
- Isaac, U. E., Oyo-Ita, E. E., Igwe, N. P., & Ije, E. L. (2023). Preparation of histology slides and photomicrographs: Indispensable techniques in anatomic education. Anatomy Journal of Africa, 12(1). https://doi.org/10.4314/aja.v12i1.1
- Kubow, K. E., & Harsh, J. A. (2025). Training module and assessment strategy for light microscopy skills training in a research environment. Journal of Microbiology and Biology Education. https://doi.org/10.1128/jmbe.00179-25
- Leck, A. (2009). Taking a corneal scrape and making a diagnosis. Community Eye Health Journal.
- Nurtamara, L., Amintarti, S., Ajizah, A., Irianti, R., & Widiyastuti, D. A. (2024). A workshop on the utilization of light microscope for biology education pre-service students of FKIP ULM through the use of wet mount preparations. Kayuh Baimbai: Jurnal Pengabdian Masyarakat, 1(2). https://doi.org/10.69959/kbjpm.v1i2.36
- Ruzin, S. E. (1999). Plant microtechnique and microscopy. Oxford University Press.
- Salmon, E. D., von Lackum, J. K., & Canman, J. C. (2005). Proper alignment and adjustment of the light microscope. Current Protocols in Microbiology. https://doi.org/10.1002/9780471729259.mc02a01s00
- Sanderson, J. (2020). Fundamentals of microscopy. Current Protocols in Mouse Biology. https://doi.org/10.1002/cpmo.76
- Sanderson, J. (2025). Essentials of light microscopy. Oxford University Press. https://doi.org/10.1093/9780191915901.001.0001
- Wayne, R. (2014). Bright-field microscopy. In Light and video microscopy (Chapter 4). Elsevier. https://doi.org/10.1016/B978-0-12-411484-5.00004-4
- Dahal, P. (2026, May 10). Parts of a microscope with functions and labeled diagram. Microbe Notes. https://microbenotes.com/parts-of-a-microscope/
- Site Editor. (2025, May 19). Microscope objective lens functions: 4x, 10x, 40x & 100x guide. Band Optics. https://www.band-optics.com/blog/understanding-the-powers-of-the-3-objective-lenses-on-our-microscopes.html
